Do you use Citibike but find the mobile app terrible? Are you trying to awkwardly plan a bike route using google maps and then wondering where you can find or park your Citibike for the route? Do you find yourself wondering if theres a bike at your starting station, whether or not you’ll be able to park it once you get to your destination, and how long the whole ordeal will take? Me too, so I decided to do something about it.
I had been messing around with Angular 2, Node and Express, a stack that is incredibly easy to deploy using github pages and Heroku. Additionally, I had previously worked with the Google Maps APIs and knew it wouldn’t be too hard to leverage the mapping and locating capabilities Google had to offer for what I had in mind. After a quick look in to the Citibike information and whether or not it was publicly accessible, I found the live data for what I was looking for. Great, I had all the tools I needed at my disposal, now I just needed to code it up.

Requirements
I started up an Angular 2 CLI project and got to coding. Although Angular 2 was still pretty new, I had found enough documentation and hacked my way through a few components, services, routers, and more by working through some of the tutorials as well as a previous project. My frontend requirements weren’t too complicated. My goal was to provide an interface to simply take a starting and ending address and then provide the routing information. I wanted to pull information for multiple modes of transit - walking, biking, Citibiking, driving, and public transit. A deeper look in to the available APIs suggested public transit would be too difficult to implement without a paid Google Maps API Key, so I left it for another day and moved forward with the other forms of transit.
Angular 2 Frontend
I was able to wireframe the app up in 2 “pages” with some dynamically added components and arrays related to travel data objects I had created. The Angular 2 service class was capable of handling all my async backend requests with some nested promises while also allowing me to pass data between multiple components. I even added in a couple animations to give the page a little bit more of a dynamic feel while also appeasing my curiosity around working with Angular 2’s animations.
animations: [
    trigger('flyInOut', [
      state('in', style({
        transform: 'translateY(0)',
        opacity: 1
      })),
      transition('void => *', [
        style({
          transform: 'translateY(100%)',
          opacity: 0}),
          animate(300)
      ]),
      transition('* => void', [
        animate(300, style({
          transform: 'translateY(-100%)',
          opacity: 0
        }))
      ])
    ])
  ]
Interfacing with APIs
Now came the fun part, interfacing with the behind the scenes APIs and bringing some real data into the fold. The first thing I needed to do was process the form input fields and turn text into an actual location - the Google Geocoding API was made for this. This allows me to input the starting or ending location as a string such as “455 Broadway” or something more familiar like “Empire State Building”. The backend then returns this information with some actual data behind it - latitude, longitude, formatted street address, etc. - while updating the text fields to show the newly checked address. You can confirm these addresses are right or put in more specific information and try again. After this step, the calculate route button becomes an option for you to get the actual travel information.
Calculating Citibike Routes
When the routes are calculated a few different things happen simultaneously. The simple part is calculating the time requirements for the regular forms of transit - walking, biking, and driving. This involves hitting the google distance matrix API with the proper information, a straight forward task that sticks to the API docs. The Citibiking calculation is a little more complicated and a few things happen along the way. First, the Citibike station information is retrieved so the most up to date information is available. These stations are then filtered based on proximity to the starting and ending addresses with some math to convert latitude and longitude to distance such that only stations within half a mile from the starting and ending locations are considered.
function filterByProximity(obj) {
    var roughFourthMile = 400; //rough estimate of .5 miles in meters
    if (measure(obj.latitude, obj.longitude, latLng.lat, latLng.lng ) < roughFourthMile) {
      return true;
    } else {
      return false;
    }
  }

  function measure(lat1, lon1, lat2, lon2){
      // generally used geo measurement function
      var R = 6378.137; // Radius of earth in KM
      var dLat = (lat2 - lat1) * Math.PI / 180;
      var dLon = (lon2 - lon1) * Math.PI / 180;
      var a = Math.sin(dLat/2) * Math.sin(dLat/2) +
      Math.cos(lat1 * Math.PI / 180) * Math.cos(lat2 * Math.PI / 180) *
      Math.sin(dLon/2) * Math.sin(dLon/2);
      var c = 2 * Math.atan2(Math.sqrt(a), Math.sqrt(1-a));
      var d = R * c;
      return d * 1000; // meters
  }
These stations are then sorted by the distance such that the closest stations are looked at. While there’s more optimization that could be done, right now the solution is taking the naive path of limiting walking to take you to the closest starting and ending Citibike stations. These stations are then used to query the google distance matrix api again with 3 separate requests, one for walking to the starting station, one for biking between the stations, and a third for walking from the end station to the final destination. Additionally, some error checking happens here for locations that are not connected by land (an error message is displayed) or locations outside of the NYC Citibike region (only the other available travel methods are calculated and displayed).
Displaying Results
With all of the data now calculated for travel methods between the starting and ending locations, this information is sent back to the frontend to be displayed to the website. Here each travel method is given a component which is rendered as an array of child components within the form page.

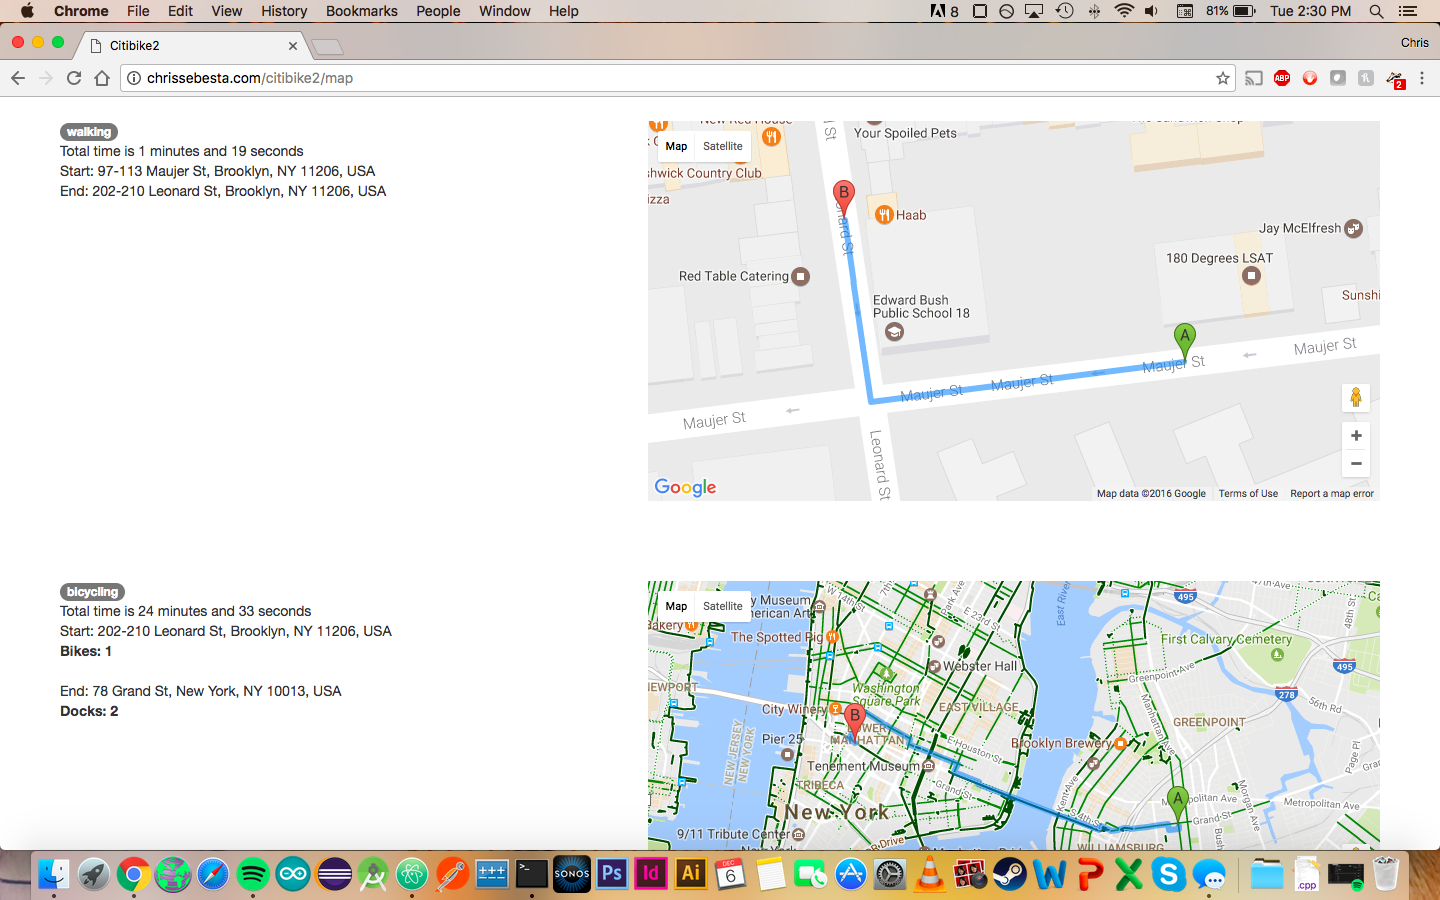
These travel methods contain a button to get directions for the selected travel method which, once clicked, presents a familiar google maps directions screen for the three simple travel methods or three individual maps for the walking, biking, and final walking directions that complete a Citibike journey. During this transition, the service is used to store the relevant information for the method of transit and a new component view is loaded with the google maps directions provided by the google directions service API.
Keeping API Keys Secret
As an aside, during the development of this I learned a good bit about the separation of my Node backend from the Angular 2 frontend, including ensuring that API keys are kept as secure as possible. I used a couple wrappers on the backend for the google APIs that are utilized to ‘Promisify’ the API response while ensuring the client does not see these keys. These backend API keys are stored as environmental process variables saved to the Heroku deployment and my local machine so they will not be pushed to the source code saved on github. On the frontend, the google directions API key was restricted to my domain for the maps that need to be displayed.
Checkout the app here and as always, feel free to shoot me an e-mail if you have any comments or feedback.